Friday, 6 May 2016

Better Together | Off the Rails Blog Hop

Hello and welcome to my blog!

Today I'm excited to be participating in the Off the Rails Design Team Blog Hop! The theme is fun, bright and colourful!


Team A are starting off today, Friday May 6th through to Sunday May 8th. Please visit each blog and leave a comment as you're hopping along!


Mandy Melville - http://mandymelville.blogspot.com.au/ You are here...


At the end of the hop please head back to the Off the Rails blog here:


and leave a comment for your chance to win a fabulous prize in the random draw!

*****************************************************************************

So, here is my "fun, bright and colourful" layout that I created for the blog hop...


I thought that this fun photo of my eldest two kids and I enjoying some frozen yoghurt would be perfect for this mood board! I originally chose it because of the bright colours in the photo, but I ended up printing it in black and white so that it didn't get lost amongst all of the bright colours on my page.

My layouts features gorgeous patterned papers and embellishments from the Amy Tangerine Better Together collection, as well as a Charms Creations arrow.

Here are some closeups of my layout so that you can see all of the fun details...


Next up on the blog hop is 
Thank you so much for visiting my blog! Please leave me a comment so that I know you were here, and if you like my work, I would love you to follow me! (links to all my social media are in the sidebar)!

Wishing everyone a happy National Scrapbooking Day for this Saturday!

Mandy

Sunday, 1 May 2016

Jump! | Stuck?! Sketches Design Team Layout

Hello again!

I'm back to share another layout with you! This one is for the May 1st challenge at Stuck?! Sketches. I always love Laura's sketches, but I think this might be one of my all time favourites! I love the design of it, and my layout came together really quickly! Here's the sketch...


I stuck fairly closely to the sketch, although I did mirror reverse it, and I used one horizontal photo instead of two vertical ones. Here is my layout...

"Jump!"


How fun is this photo of my two eldest kids! We recently went on a family holiday and the place where we stayed had this awesome lagoon that you could swim and canoe in. My kids had an absolute ball jumping off the wharf into the lagoon!

I was so happy recently to find that my local Spotlight store finally got the Amy Tangerine Better Together collection in! I have been loving seeing everyone's gorgeous projects with this collection, so I was so pleased to finally have a play with it myself! And I think that it was just perfect to document this photo!

Here are a couple of closeups of my layout...


Lots of the sayings on the cut apart sheet were perfect for this layout... I used the "Here we go" and the "Happy Together" ones! For my title I used Thickers from one of the older Amy Tangerine collections (Rise and Shine I think).


As always I used lots of foam tape between my layers for added dimension. To the right of my photo I created a little cluster using a couple of D-lish Scraps flowers. You can also see here the resin bird that I added.

If you haven't done so already, I hope that you'll head on over to the Stuck?! Sketches blog and take a look at the gorgeous layouts that my fellow design team members have created! We would love YOU to play along with us by creating a layout based on the sketch! Link up your layouts on the Stuck?! Sketches blog by May 29th to be in the running to win a prize from one of our very generous sponsors:


We will also be choosing a scrapbooker from each of our challenges to be a guest designer with us at a later date!

Thank you so much for visiting my blog and taking a look at my layout! Thank you to those who take the time to leave a comment as well - it is always very much appreciated!

Mandy

Sweet Dreams | Scrap the Girls May Design Team Layout

Hello friends!

I can't believe that May is upon us already, but here we are at the start of a new month once again, and that means that it's time for some fresh scrappy challenges!

This month over at Scrap the Girls we have a sketch challenge! Everybody loves a good sketch to inspire your creativity right?! Well, here is our sketch for this month, designed by Kristine Davidson...


For my layout, I stuck to the basic placement of all of the elements on the sketch including the photos, the title, the embellishment clusters and the journalling, but I decided to exclude all of the paper layers behind the photos. Here's my layout...

"Sweet Dreams"


How sweet are these photos of my baby girl sleeping?! I don't often get to snap photos of her sleeping because she's quite a light sleeper and will usually only sleep when she is tucked into her cot with her bunny and dummy. But this day we were visiting my sister and she was so tired that she fell asleep on the lounge. Of course I had to take the opportunity to quietly take some photos of her!!

I finally got my hands on the Maggie Holmes Bloom patterned papers recently and I just love them! I fussy cut the yellow flowers from one of the patterned papers and I love how pretty these are!

Here are some closeups of my layout...


As I quite often do, I combined different alphas to create my title. I used a foam word from the Amy Tangerine Better Together Thickers pack combined with chipboard Thickers.


I created a little cluster here with a Maggie Holmes tag, which a added a glitter chipboard heart to, as well as a flair button and a resin flower, both from D-lish Scraps.


I added this strip from one of the cut apart sheets along the bottom of my layout to replicate the strips of patterned paper running horizontally on the sketch. The phrase on it was just perfect for my photos!

If you haven't done so already, I hope that you'll pop on over to the Scrap the Girls blog and take a look at the gorgeous layouts that my fellow design team members have created with this sketch! Link up your layouts on the Scrap the Girls blog by May 31st to have a chance of winning a prize from our very own AJ Redicliffe!

Thank you for taking the time to visit and for your lovely comments also! I will be back later today with my design team layout for Stuck?! Sketches!

Mandy

Thursday, 28 April 2016

Love her Smile | Off the Rails Scrapbooking Tutorial

Hello friends!

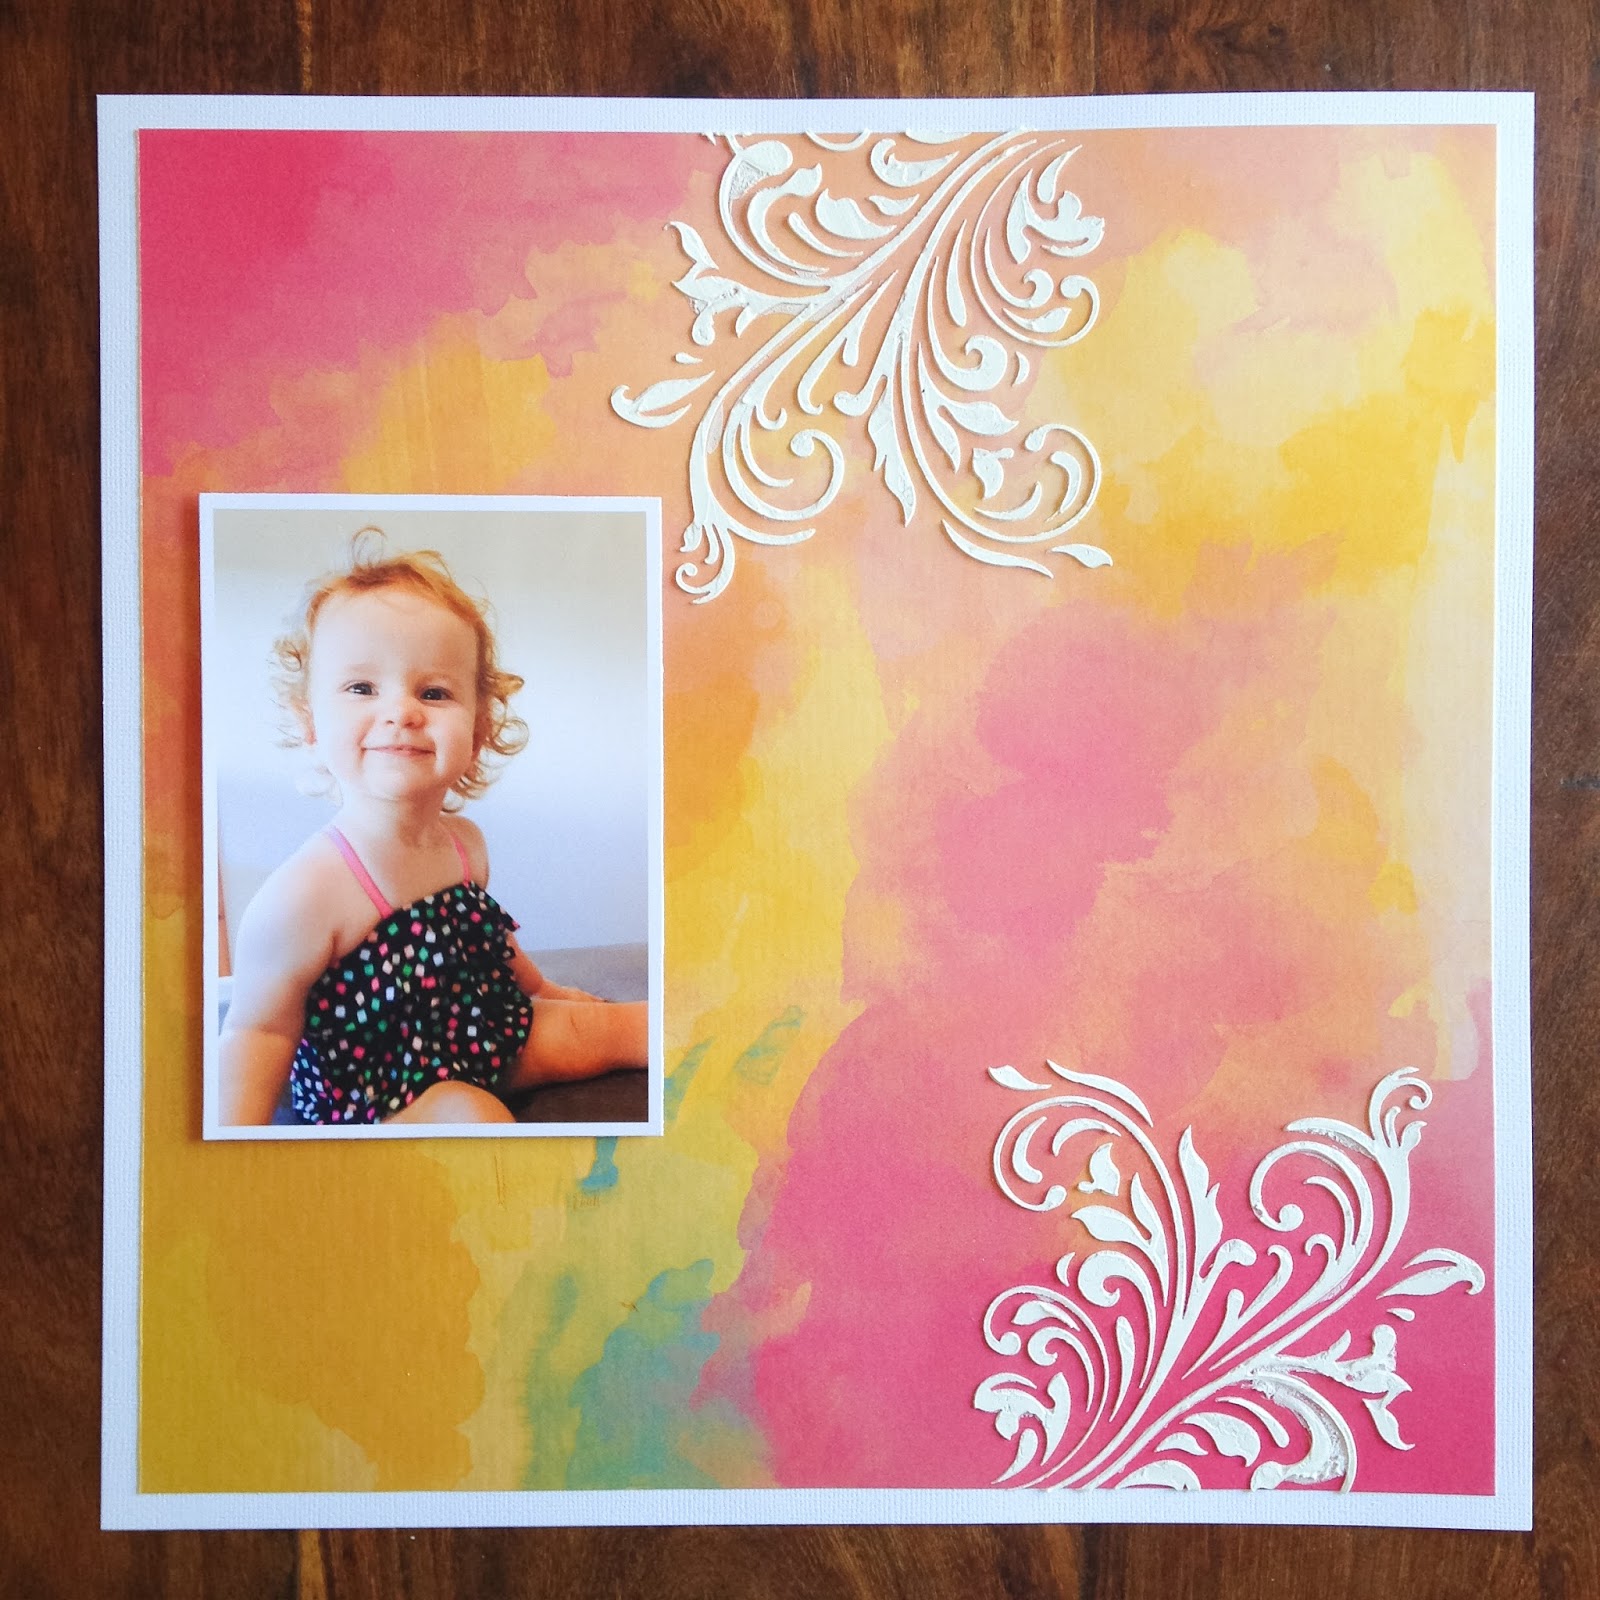
Today I'm up on the Off the Rails blog sharing some tips and techniques for adding texture and dimension to your layouts! When I look back at some of the first layouts that I created years ago they seem very flat. Now don't get me wrong, I still really love those layouts, but over the years my style has changed, and these days I'm drawn to layouts with lots of texture and dimension... the kind of layouts that you want to reach out and touch! So today I'm going to take you through a step-by-step tutorial and show you how I have added texture and dimension to my layout!

I created this layout for the current Off the Rails mood board...


What you'll need

This is everything that I used to create my layout

Step 1

Firstly, trim about 1/3 inch off each side of your patterned paper so that you can mat it on white cardstock. Next, using your chosen stencil, apply texture/modeling paste to your patterned paper. You can use a palette knife to do this if you have one, otherwise an old credit card/gift card will do the trick!


Using modeling paste with a stencil is a really effective way of adding texture and dimension to your layout!

Step 2

Next add some foam tape to the back of your photo and adhere it to your layout.


Using foam tape is another way that I like to add dimension to my layouts, as it gives different heights to the elements on your page.

Step 3

Next, create a flower cluster to the right of your photo. You can see here that the flowers add lots of beautiful texture and dimension to my layout!

Step 4

Next, add your title to the layout. Here's another opportunity to add different textures and dimension to your layout. I love to combine different alphas to create my titles! On this layout you can see that I've used chipboard alphas as well as a wood veneer word. The chipboard alphas also have gold foil on them so this adds another texture!

Step 5

Next, add a die-cut to the right of your title. I chose a flamingo to tie in with the mood board! Once again I've added foam tape to the back of it to give it extra dimension.

Step 6

Lastly, I've created a small cluster in the top right hand corner of the layout using another die-cut and a couple more flowers.

And that's how easy it is to create a layout with lots of texture and dimension! Next time you scrap, why don't you try out one of these techniques that I've used on my page...
- Add some stencilling using texture/modeling paste
- Add foam tape to the back of your photo and/or die cuts
- Create a flower cluster
- Use different textures such as chipboard, wood, foil etc

Here's another look at my completed layout...


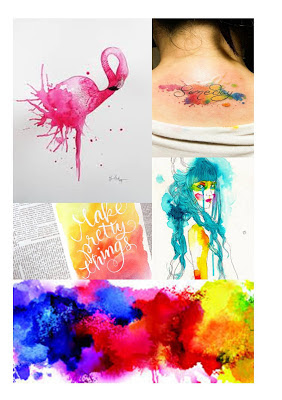
And here's the current Off the Rails mood board that inspired my layout...


I hope that you get a chance to play along with our mood board challenge this month! There's only 2 more days left to get your projects linked up! Our sponsor for April is Memory Maze.

Thanks so much for stopping by, I hope that you found my tutorial useful and enjoyed looking at my layout!

Mandy

Saturday, 23 April 2016

She loves Frozen | D-lish Scraps Design Team Layout

Hi scrappy friends!

Today I have my final D-lish Scraps share for the month and I've created a layout for one of our current Cybercrop challenges in The Scrap Suite! Here's my layout...

"She loves Frozen"


You can probably guess which challenge this is for... Yes, it's Krisy's! She has challenged us to create a project inspired by a Disney Princess!


I just had to play along with this challenge because I really wanted to create a layout about my daughter's love of the movie Frozen! When Eleanor was around 12 months old, we put Frozen on the TV one day and she was glued to it! It's the only thing that actually keeps her attention on the TV, and she could probably watch it over and over if we let her! At nearly 18 months old, she can now say "Elsa", "Anna" and "Olaf"!

I started my layout off by cutting the snowflakes on my Cameo using a cut file from The Cut Shoppe. Once I had a rough idea of where I wanted the snowflakes and my photo to go, I used a piece of punchinella as a stencil and applied some distress ink through it around where I wanted my photo to go. Next I created some layers behind my photo, using patterned papers as well as a 5x7 chevron bag. Then of course I added some pretty D-lish embellies!

Here are some closeups of my layout...


I love lots of dimension on my layouts, so I added foam tape between the layers on the snowflakes as well as behind my photo. I popped an arrow paperclip onto the top right hand corner of my photo, and you can also see here the flair button that I added on top of one of the snowflakes.


I created a little cluster up in the top left hand corner of my layout using silver glitter washi tape, punchinella and a gorgeous light purple sequin bow.


To the left of my photo I added my title and journalling. I used the white Kaisercraft Alpha stickers combined with silver glitter Thickers for my title. I like the subtlety of the white letters against the white background! You can also see some of the pretty stencilling here - how versatile is punchinella!!

If you haven't done so already, why don't you pop on over to The Scrap Suite and check out our Cybercrop challenges for this month (one of them is set by me)! We'd love you to play along with us too! You've got until 13th May to upload your projects (it doesn't have to be a layout... You can create a card, PL page or OTP project if you prefer!).

Thanks so much for popping in and taking a look at my D-lish layouts over the past few days. Thank you to those who leave a lovely comment as well!

Mandy

Friday, 22 April 2016

Sweet Delicious Strawberries | D-lish Scraps Design Team Layout

Hello again!

I'm back today to share another D-lish Scraps layout with you!

We recently went on a family holiday to Port MacQuarie and while we were there we went strawberry picking. This is something that we love to do and has become a bit of a tradition that we do each time we go to Port MacQuarie. I always take lots of photos when we go strawberry picking, but I never seem to get around to scrapping them. This time, I decided that I was going to scrap the photos straight away! So here is my layout...

"Sweet Delicious Strawberries"


I wanted to include four photos on this layout, so I decided to print them smaller in a grid. This is an easy way of including multiple photos on your layout without it becoming too crowded.

My layout features patterned papers from the Maggie Holmes Bloom collection and the Dear Lizzy Fine and Dandy collection, and of course lots of D-lish embellies!

Let's take a look at some closeups...


I started my layout off by creating some layers behind my photos. I've used some patterned papers as well as a paper doily and a black and white stripe bitty bag. I added foam tape between the layers for some added dimension.


To the left of the photos I added a hessian heart from my stash and topped it with a flair button from the March Just Add Paper kit. Under the layers I tucked a kraft shipping tag which I finished off with some black and white twine.


I decided that I wanted a nice big title on my page, and I always love to combine different alphas to create my titles. I used a Corbett Creations wood veneer word as well as Thickers and a cut file. I love that by using different textures, colours and fonts in my title that it adds plenty of interest to the layout.


In the bottom right hand corner of my layout I created a cluster that includes a burlap button flower, a Kaisercraft bloom and a sweet little wooden strawberry button that was just perfect for this page! I think that the natural textures that I've included on the page such as the hessian, wood and cotton twine really complement the theme of the layout.

Well that's all from me for today. Thanks so much for stopping by and taking a look at my layout! I will be back tomorrow with my final D-lish share for the month... This time I've played along with one of the Cybercrop challenges in The Scrap Suite!

Mandy

Thursday, 21 April 2016

Flower Girl | D-lish Scraps Design Team Layout

Hello!

Today I'm sharing my first layout for D-lish Scraps for this month, and I'm kicking it off with my take on the April Inspiration Board challenge!

"Flower Girl"


Here's a reminder of our inspiration board for this month...


I was totally inspired by the soft colours and textures on the inspiration board! I decided to scrap this sweet photo of my daughter when she was a flower girl at my sister's wedding. I think the textures on the board reminded my of her beautiful lacey dress and the chiffon flowers in her hair.

My layout features patterned papers from the Maggie Holmes Bloom collection.

I started my layout off by cutting the floral wreath using a cut file from The Cut Shoppe and my Silhouette Cameo. I backed the cut file with patterned papers and added some foam tape to the back to give it some dimension. I then used a pip berry stem and wound it around and through the wreath. 

Here are some closeups so that you can see all of the D-lish pretties that I've used on my page...


I used some of the embellishments from the April Just Add Paper kit on my layout. Here you can see one of the the flair buttons and a resin flower. I also added a silver sequin bow to the corner of my photo.


Here you can see another one of the flair buttons and part of the pip berry stem.


Under the left hand side of my photo I tucked the journal spot from the journal pack in this month's kit. I also added one of the roses from the kit. Underneath the journal spot I tucked a rose that I fussy cut from a card that came in the Fruit Tingle journal pack (this is currently still available, but be quick because once it's gone it's gone!).

I hope that you will play along with our Inspiration Board challenge this month! Link up your layout on the D-lish Scraps blog by the last day of the month for your chance to win a prize! (Don't forget to read the rules for entering here). Please feel free to share your projects that you create for the Inspiration Board over in our Facebook group The Scrap Suite as well!

Thank you so much for stopping by and taking a look at my layout today! I'll be back tomorrow with another D-lish Scraps share, so until then, happy scrapping!

Mandy