
Hi friends!
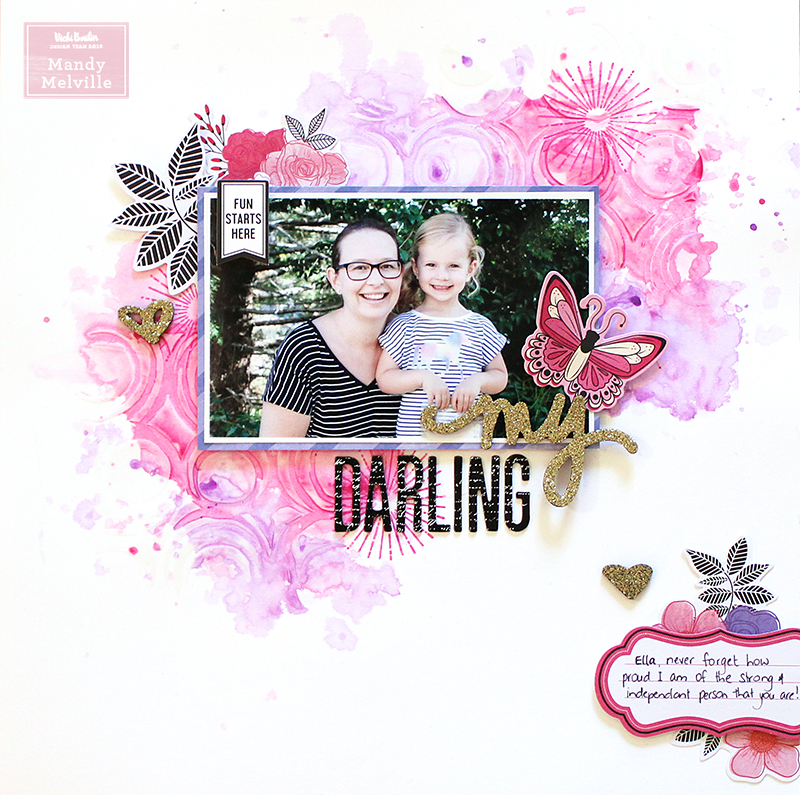
Today I have a a new layout to share with you for the Vicki Boutin design team! This one is a very ‘girly’ page, featuring beautiful shades of pink and purple from the ‘All the Good Things’ collection. On this layout, I documented a photo of me with my youngest daughter Eleanor, and I wanted to journal about how proud I am of the little person that she is.
Over the past few weeks, I’ve been having so much fun playing along with the Junque Journal Summer Camp prompts, and so I thought this week, that I would show you how I transfer the techniques that I’m practising in my junque journal, onto a scrapbook layout. So to create the background for this page, I used the exact same techniques and method that I used to create the junque journal spread that I shared here on Vicki’s blog last week (the one titled ‘Selfies’).
Here’s a look at my layout…
This is how I created my background…
I started off with a sheet of the Vicki Boutin Foundations Paper, and I primed it with gesso first, before adding any of the mediums.
Next I applied some Vicki Boutin matte acrylic gel through the circle stencil using a palette knife. This added some great texture to the background behind where I wanted to add my watercolour.
Once that was dry, I applied the art crayon over the top using the ‘kissing’ technique. To get the colours that I wanted, I mixed the art crayons together on the plastic packaging with a little water. I love the bright shades of pink and purple!
Lastly I added some stamping using the circle stamps and Color Wheel pigment inks.
I love how this background turned out!

Once I was finished with my background, I was ready to add my photo and embellishments! I matted my photo with the reverse side of the Birds of a Feather patterned paper and adhered it using craft foam for added dimension. I created my title using a combination of the foam and chipboard Thickers from the ‘All the Good Things’ collection, and then added a beautiful die cut butterfly above the title.

I created a floral cluster under the top left hand corner of the photo using die cuts from the collection, and I also added a little chipboard banner from the Finishing Embellishments pack on the top corner of the photo.

To balance out the main photo cluster, I created a smaller one down in the bottom right hand corner of the layout. This cluster includes another floral die cut, and a label, which I adhered using craft foam. I used this to add my journaling to. I finished the page off with a couple of gold glitter hearts from the foam Thickers pack, to tie in with the gold that I’d used in the title.
Thanks so much for joining me today! I hope that you enjoyed taking a look at my layout! If you’d like to see how it came together, you can check out my process video over on my YouTube channel…
Supplies Used:
Foundations Paper
Gesso
Acrylic Gel Matte
Art Crayons #1 – Warm
Art Crayons #2 – Cool
Color Wheel Pigment Inks – Warm Tones
Stencils
Stamps & Dies – Set 3
Waterbrushes
Brushes
Thickers – Alpha/B&W Chipboard
Thickers – Phrase/Glitter Foam
Cardstock Die Cuts – Icons
Cardstock Die Cuts – Frames
Self-Adhesive Finishing Embellishments
Double-sided Patterned Paper – Birds of a Feather

No comments:
Post a Comment