Friday, 1 January 2016

3 Today | Scrap the Girls January DT Layout

Happy New Year!!

I can't believe that we are already in 2016!! The good news is that the start of the new year brings with it some new scrappy challenges to keep us scrappers feeling inspired! I have a couple to share with you today... first up is the January challenge at Scrap the Girls!

This month we are having a one-off 'free for all' challenge. You can create whatever you like, whatever colours you like, and whatever design you like. The only rule is your layout must be exclusive to the Scrap The Girls challenge, and of course, must be a layout where you 'Scrap The Girls', to be eligible for the prize.

But just in case you like to work within parameters, there is an optional sketch designed by Kristine Davidson to get your creative cogs going...


Our sponsor this month is Dark Room Door and the Scrap the Girls design team received some lovely Dark Room Door goodies to use on our layouts for this month! So here is my layout...

"3 Today"

 
I used the Dark Room Door Photo Chips (which I cut up into triangles), a Film Strip, and Word Strip.

My layout features a photo of myself with my daughter and my Mum, taken about 8 1/2 years ago on my daughter's 3rd birthday!

Here are some closeups of my layout...


I totally adore that Charms Creations heart, and it was the perfect colour to co-ordinate with my page! I also added a hot pink and a yellow rose, both from D-lish Scraps, to create a little cluster on the corner of my photo.


I love the gorgeous bright colours and flowers on these photo chips from Dark Room Door, and I'm happy with how they turned out when I cut them into triangles! I mounted some up with foam tape to add extra dimension to the page! You can also see here a couple of the words that I cut from the Word Strip. These are great for adding little words or phrases to your layouts or cards!

If you haven't done so already, I hope that you'll pop on over to the Scrap the Girls blog and take a look at the gorgeous layouts that my fellow design team members have created using the Dark Room Door products! We would love you to join us for our free-for-all challenge this month! Link up your projects on the Scrap the Girls blog by January 31st to be in the running to win a prize pack from Dark Room Door.


Thank you for taking the time to visit and for your lovely comments also! I will be back later today with my design team layout for Stuck?! Sketches!

Mandy

Wednesday, 23 December 2015

Joy | D-lish Scraps Design Team Layout

Hi everyone!

I'm back with my final D-lish Scraps share for the month! As Christmas is now only 2 days away, I wanted to share a Christmas themed layout with you!

My layout features a super fun photo of my eldest two kids having an absolute ball while we decorated our Christmas tree this year. I absolutely love the joy on their faces. So here is my layout...

"Joy"


I purchased the Christmas Mini Kit that went on sale at the end of last month and used lots of the items from the kit on this layout. (This kit has unfortunately now sold out.) I love the turquoise and red colour combo for a modern twist on the Christmas colours!

I started my layout off by adhering a strip of patterned paper across the top of my white cardstock. Where the patterned paper meets the cardstock I have done some stamping, and then I added a thin strip of punchinella over the join. I'm seriously loving this stuff, and I've just ordered it in 3 more colours!! It also goes a long way - I'm still using up the piece of white punchinella that came in the 'After Five' JAP kit last month as I tend to use small pieces of it here and there.

Let's take a look at a few closeups...


There were so many awesome wood veneer pieces in the mini kit! I used the 'Christmas 2015' wood veneer frame over the top of my photo and then mounted the photo up with foam tape for some added dimension. Behind the photo I've layered a couple of the journal cards that came in the kit, along with a diagonal stripe bitty bag. To the left of my photo I've added a flair button and a phrase from the Christmas minifetti sheet that came in the kit on top of a felt star from my stash.


Along the bottom of my layout I've added a strip of washi tape. Then in the bottom right hand corner of my layout I've created a little cluster that includes another small strip of punchinella, a couple of die cuts from the mini kit, and a Freckled Fawn glitter star chipboard sticker.


To the right of my photo I've added lots of pretty D-lish goodies including another flair button, a beautiful red sequin bow, some more phrases from the Christmas minifetti sheet, and some more of the glitter chipboard stars. I used the wood veneer word 'Joy' as the title for my layout... I thought that it was the perfect word to describe my photo! I finished my layout off by adding a scattering of red stars by applying some red distress ink through the Scrap FX Star Confetti stencil.

Well, that's the last of my D-lish Scraps projects for this month! Thank you so much for stopping by, and I hope that you have enjoyed looking at my D-lish layouts over the past few days! I would like to take this opportunity to wish you and your families a very blessed Christmas!

Mandy

Tuesday, 22 December 2015

Sweet | D-lish Scraps Design Team Layout

Hi everyone,

I'm back today with another layout for D-lish Scraps to share with you! This one was created for the December Inspiration Board.

My layout features a sweet photo from my baby girl's newborn photo shoot when she was just 2 weeks old...

"Sweet"


Here's a reminder of what the Inspiration Board looks like...


How gorgeous is it?!! I was inspired by the pretty colours, the roses and the string of confetti. I used lots of items from the December Just Add Paper kit for my layout. These kits are such great value and make putting a layout together super easy! Although this kit has now sold out, most of the items are still available to purchase separately here.

To create my background I used light pink and yellow distress ink to create a watercolour effect and then I applied some modelling paste through a rose stencil over the top. I like the subtle colour and texture that this adds to the background. I then stuck the confetti garland that came in the JAP kit down the right hand side of my layout. This was one of my favourite items from the kit this month!

I created some layers underneath my photo using the mint spot tissue paper from the kit, some patterned papers, and a white paper doily.

Let's take a look at a couple of closeups so that you can see all the details...


I created a little cluster to the left of my photo using the 'Fruit Tingle' tag from the kit packaging, a medium white rose, a flair from the kit and an arrow word tab.


To the top right hand corner of my photo I attached a white peg and then I tucked the 'Date' die cut from the kit peeking out from underneath the photo. To the right of my photo I've added a small paper butterfly. These come in white, and are pretty left as is, but it's also very easy to give them some colour with inks and sprays. I mixed a gelato with some spray ink to get the colour that I wanted before painting it onto the butterfly with a paint brush. I created a flower cluster to the right of my photo using the yellow burlap flower and one of the pink apple blossoms that came in the kit, as well as another white rose. There were some really pretty wood veneer pieces that came in this kit as well, and I've used the word 'sweet' as the title for my layout. I finished my layout off by adding a phrase from the yellow minifetti sheet and the 'Remember this' die cut from the kit, which I used for my journalling.

Thanks so much for stopping by again today! Maybe you might be able to find some creative time after Christmas to be able to play along with our December Inspiration Board challenge? I will be back tomorrow with one last D-lish share for the month... This time it will be something Christmas themed!

Mandy

Monday, 21 December 2015

New Pool | D-lish Scraps Design Team Layout

Hi there!

Today I'm up on the D-lish Scraps blog sharing my take on one of December Cybercrop challenges in The Scrap Suite!

My layout features a cute photo of my youngest daughter Eleanor on her 1st birthday, taking a dip in her new pool...

"New Pool"


My layout is based on the Cybercrop challenge that Sue has set for us this month...


I was inspired by the explosion of colours in the image and I tried to mimic this on my layout. I also used similar colours from the image, and  I used the word 'new' in my title.

To create my background I started off by adding watered down pink Distress Ink using the "packaging technique" to create a watercolour effect. I then used some punchinella as a stencil and applied yellow distress ink through it as well as some modelling paste. Next I used some bubble wrap (which was used to package one of my D-lish orders) as a stamp. I simply rubbed some blue ink onto the bubble wrap and stamped it down. I finished my background off by stamping with some black ink and adding some black ink splatters.

Once my background was dry, I was ready to start building some paper layers as a base for my photo. I tucked some light pink hand dyed muslin under the paper layers to add some extra texture to the background. On top of my photo I've added a circle of hot pink coloured wire to draw the viewers attention in. This was the first time I've used the coloured wire and I found that it was very easy to manipulate into the shape that you want. I simply wrapped it around a bowl and it was ready to go!

Here are a couple of closeups of my layout so that you can see all the D-lish pretties that I've used...


There are lots of gorgeous flowers and embellishments in this main cluster! I started off with a white wild rose (one of my faves at the moment!), and then added a large hot pink rose, a blue gardenia, and a white pastel petal. To finish the cluster off I added a flair from the Newsprint Butterflies set, and a yellow sequin bow (also one of faves!). You can also see here two of the phrases from the minifetti sheets... I've added a few of these to my layout in blue, yellow and pink. These are one of my go-to items in my stash of D-lish goodies and usually find their way onto most of my layouts! 


Up on the top right hand corner of my photo I've added a flair from the Superhero set as well as another hot pink rose. As well as using the punchinella as a stencil, you can also see here that I tucked some under the top right hand corner of my layers! This stuff is awesome for adding texture to your projects!

Thanks so much for stopping by and taking a look at my layout! If you're not yet a member of our Facebook group The Scrap Suite, we'd love you to join us! There's always lots of inspiration and fun challenges happening!

I'll be back tomorrow with another share for D-lish. Until then, happy scrapping (or last minute Christmas shopping if you're anything like me!)

Mandy

Tuesday, 15 December 2015

Abi & Grace | Stuck?! Sketches December 15th DT Layout

Hi there!

I'm back to share my design team layout for the latest sketch challenge at Stuck?! Sketches! I really loved the pretty flowers and layers in this sketch! Let's take a look...


Here is my layout...

"Abi & Grace"


My layout features a cute photo of my eldest daughter Abi with my niece Grace when they were snuggling together in their dressing gowns when Grace came for a sleepover at our house.

I used patterned papers from the Amy Tangerine Finders Keepers collection.

I started my layout off by applying some modelling paste through a stencil onto my white cardstock. I love the look of white on white and the subtle texture that this adds. I then did some stamping on my background where I knew I was going to add my photo and paper layers so that it is coming out from behind the layers.

Here are some closeups so that you can see all of the details...


I tucked a doily in behind the top left hand corner of the layers and then added two flowers to the corner of the photo (both from D-lish Scraps).


I created another pretty flower cluster on the bottom right hand corner of the photo, using more flowers and a flair from D-lish Scraps.


I like adding little phrases and words strips to my layouts!


And one last closeup of the main area so that you can see all of the pretty details.

If you haven't done so already, I hope that you'll pop on over to the Stuck?! Sketches blog and take a look at the fabulous layouts that my fellow design team members have created! We hope that you might be able to find some time to play along with us during this busy month! Link up you layouts on the Stuck?! Sketches blog by December 29th to be in the running to win a prize from one of our very generous sponsors:


We will also be choosing a scrapbooker from each of our challenges to be a guest designer with us at a later date!

Thank you so much for visiting my blog and taking a look at my layout! Thank you to those who leave lovely comments as well - it is very much appreciated!

Mandy


Wish | Off the Rails Design Team Layout

Hi there!

I was so thrilled recently to have been invited to join the Off the Rails Scrapbooking Design Team!! There are so many talented people on this team and although I wasn't necessarily looking to jump onto another team, I could not say no to such an awesome opportunity!!

So today I'm sharing my first layout for Off the Rails. First up lets take a look at the gorgeous mood board for this month in case you haven't seen it yet...


I think it's Christmasy with a bit of a twist! I never would have thought of using these non-traditional colours on a Christmas layout, but I am so glad that I did, because I love the end result. So here is my take on the mood board...

"Wish"


I had these photos of my eldest daughter from last Christmas that I hadn't yet scrapped and the colours were perfect for this challenge!

I started my layout off by using the "packaging technique" to smudge some yellow, pink and blue Distress Inks onto my background to create a watercolour effect. Once that was dry I applied some modelling paste through a star stencil over the top.

Here are a couple of closeups of my layout so that you can see all the details...


To create the Christmas tree, I tried something new that I haven't done before... I covered some cardstock with strips of washi tape and then cut the tree using my Silhouette Cameo and a cut file from The Cut Shoppe. It cut through the washi tape really well. I think I will definitely try this technique again! I then decorated the Christmas tree with silver glitter stars and sequins. I finished it off by adding a beautiful Charms Creations star to the top!


I used the word 'wish' from the mood board as the title of my layout. I used the same technique with washi tape and a cut file to create the title. I then mounted it up with foam tape for extra dimension. To the left of my photos I created a little cluster that includes a journal spot, a flair, a sequin bow, a resin flower and a silver glitter star, all from D-lish Scraps. I finished my layout off with a sprinkling of sequins!

If you haven't done so already, pop on over to the Off the Rails Scrapbooking blog and take a look at the gorgeous projects that my fellow design team members have created! I hope that you will find some time in this busy month to play along with us and create a project using the mood board. Link up your project on the Off the Rails blog by the end of the month to be in the running to win a prize from our very generous sponsor Charms Creations:


Did you spot the pretty Charms Creations star on my layout?!

Thank you so much for visiting my blog and taking a look at my layout!

Mandy

Monday, 14 December 2015

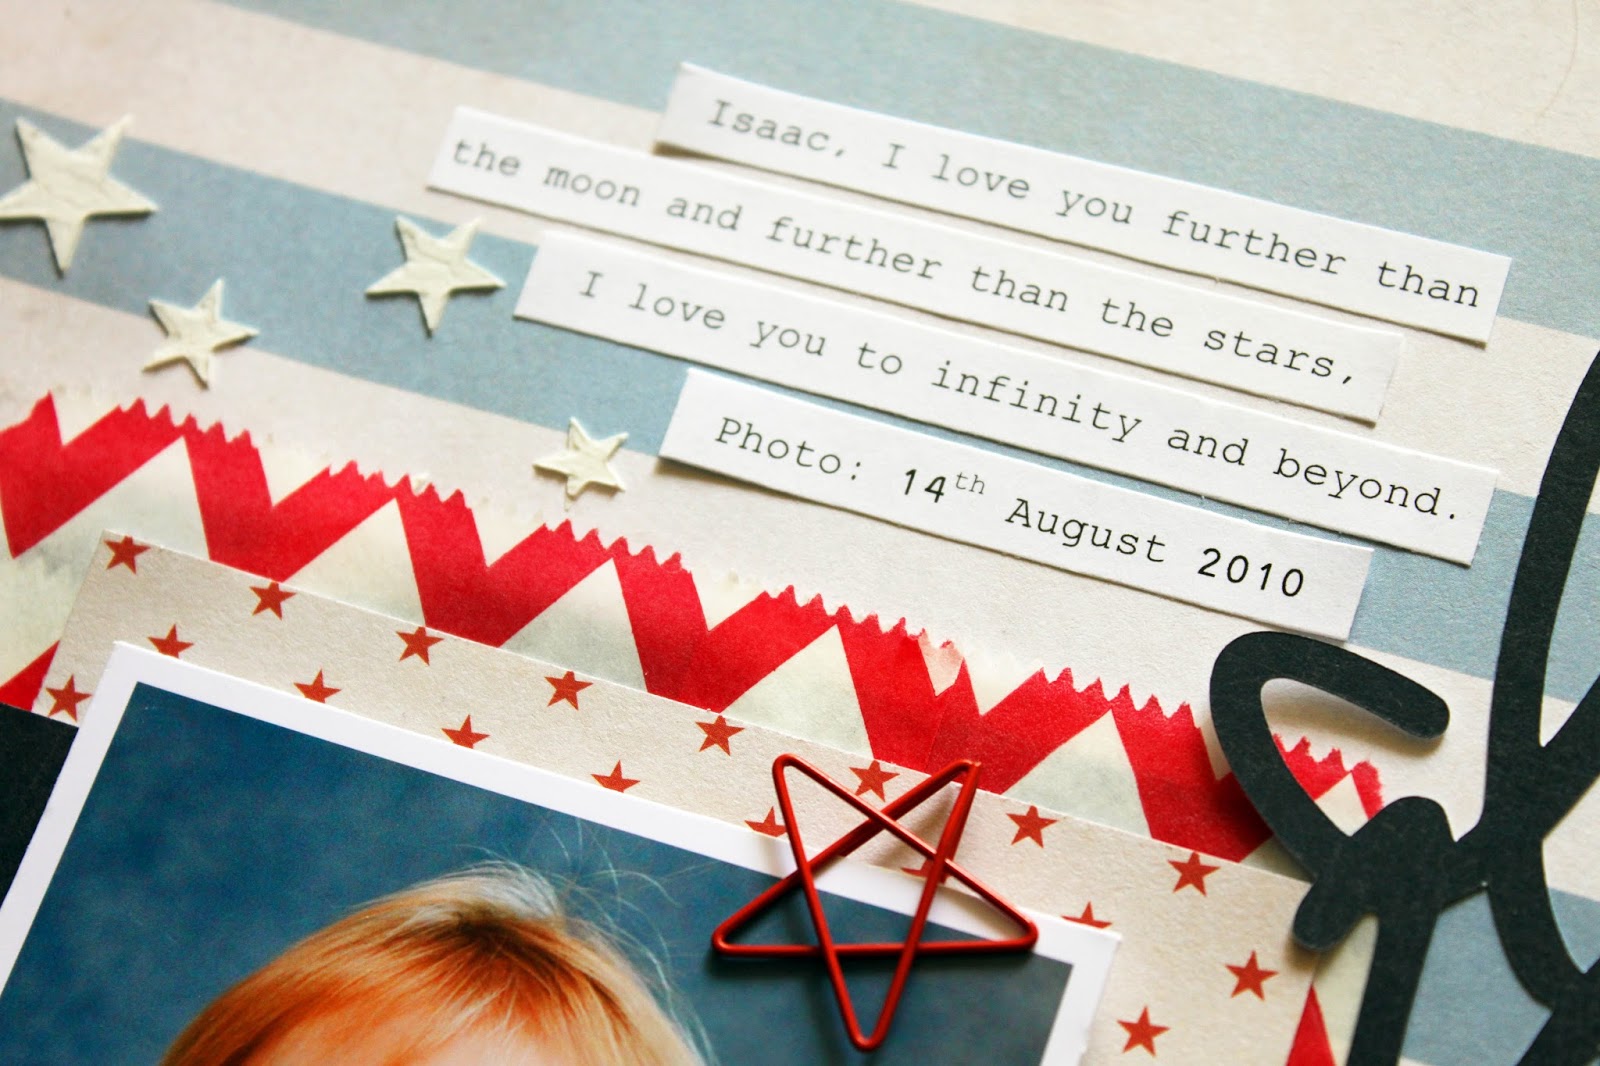
I love you to infinity & beyond | The Scrap Suite Cybercrop Challenge

Hi there!

It's my turn to set one of the Cybercrop challenges in The Scrap Suite this month! If you're not a member of our Facebook group yet, we would love you to join us! Each month, four of the D-lish Scraps design team members set a challenge, and the randomly chosen winner of each challenge wins a $10 store credit to the D-lish Scraps store! The current challenges run through until 15th January, so if you don't get a chance to play along during the busy couple of weeks leading up to Christmas, there's still plenty of time afterwards!

Okay, so here is the challenge that I have set...


I chose a well-known quote from Toy Story as inspiration for the title of my layout...

"I love you to infinity and beyond"


This layout features a super cute photo of my son on his 3rd birthday! The patterned papers that I've used are from the Pink Paislee Atlas collection. I cut my title on my Silhouette Cameo using a cut file from The Cut Shoppe.

Here are some closeups so that you can see all of the details...


As a base for my layers I used a 5x7 chevron bag, and I tucked some punchinella underneath the layers for some added texture as well. To the left of my photo I added a wood veneer heart, a resin mini daisy, and an arrow word tab, I've also included a phrase from the red minifetti sheet underneath my photo.


I stuck this cute wood veneer pinwheel next to my title to add some interest on the right hand side. I popped an enamel dot in the middle of the pinwheel, and added another word from the red minifetti sheet next to it.


To the top right hand corner of my photo I attached a Freckled Fawn star paperclip.

I finished my layout off by applying some modelling paste through the Scrap FX Star Confetti stencil. I also added a flair button to the heart at the bottom of the title.

Thank you so much for stopping by and taking a look at my layout! Thank you to those who take the time to leave me a comment as well... it is always very much appreciated! I hope that you get time to play along with my challenge... remember that you've got until January 15th! And for further inspiration, checkout the other three design team members' challenges that have been set this month in The Scrap Suite!

Mandy