Thursday, 1 September 2016

Beautiful | Stuck?! Sketches September 1st challenge

Hi friends!

Did you know that this month Stuck?! Sketches are celebrating their 3rd birthday!! How exciting!! To celebrate, we are having an anniversary bash for the entire month of September!! We have additional sponsors, a blog hop and more, so you won't want to miss the fun!!


Now, to share with you our September 1st sketch designed by our awesome owner and sketch designer Laura Whitaker...


And here is my take on the sketch...


This photo is of my youngest daughter and I on Christmas day last year. I decided to turn the photo black and white as I wanted to create a monochrome layout using the super gorgeous 'Love Always' collection from Cocoa Vanilla Studio.

Here are some closeups of my layout...


To the left of the photo I added a Charms Creations chevron and I popped a flair button from the Love Always collection on top. I love the spotty Charms embellishments, and this co-ordinated perfectly with my page!


To the right of my photo I created a pretty flower cluster using an aqua magnolia and a white cherry blossom, both of which can be found in the D-lish Scraps store. I added some Cocoa Vanilla die-cut leaves, and also tucked a wood veneer ampersand into the cluster to finish it off.


I added my title to the bottom right hand corner of the layout along with some Cocoa Vanilla die cuts. The Stuck?! Sketches design team were super lucky to receive some flair buttons from Accent Scrapbooking to play with this month, and I added one of these flair buttons to this cluster.

If you haven't done so already, I hope that you'll head on over to the Stuck?! Sketches blog and take a look at the gorgeous layouts that my fellow design team members have created! We would love YOU to play along with us by creating a layout based on this sketch! Link up your layouts on the Stuck?! Sketches blog by September 29th to be in the running to win a prize from one of our very generous sponsors:


And be sure to stay tuned for all the fun things happening throughout the month!

Thank you so much for visiting my blog and taking a look at my layout! Thank you to those who take the time to leave a comment as well - it is always very much appreciated!

Mandy

Sweetheart | Scrap the Girls September Challenge

Hi friends!

Can you believe that we are in September already?! I don't know where this year has gone! But the good news is that the start of the new month brings some fresh scrappy inspiration from our favourite challenge blogs! This month over at Scrap the Girls we have a sketch challenge, and it is just gorgeous...


Here's my design team layout inspired by the sketch...


I absolutely adore this photo of my little Eleanor! I love her blue eyes and her curls so much... What a little sweetheart she is!

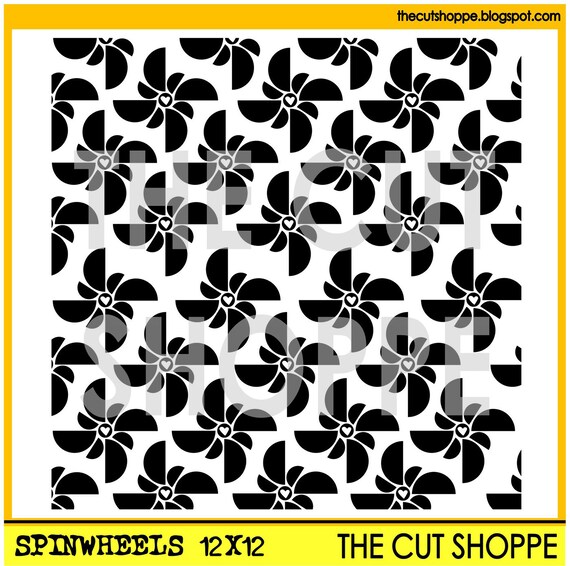
The patterned papers that I used on this layout are from the Pink Paislee Citrus Bliss collection. I started my layout off by creating the background using a cut file from The Cut Shoppe...

The Spinwheels background cut file is available in 8.5x11 and 12x12 sizes, for your scrapbooking and papercrafting projects.

I traced one of the pinwheels on this background design in my Silhouette sofware, and copied it multiple times so that I could create a design similar to the one on the sketch. I then backed each pinwheel with a different patterned paper! I think they look really pretty!

Here are a couple of closeups of my layout...


For my title, I used a gorgeous wood veneer word from Flutterby Designs!


To the right of my photo I created a little flower cluster using a pink Kaisercraft bloom and a white Green Tara Azalea. I also added wood veneer leaves to the cluster (these are from the Cocoa Vanilla Studio Love Always collection).

I finished my layout off with some journalling, and a few chipboard buttons from the Paige Evans Fancy Free collection.

If you haven't done so already, I hope that you'll pop on over to the Scrap the Girls blog and take a look at the gorgeous layouts that my fellow design team members have created with this sketch! I hope that you'll play along with us this month! Link up your layouts on the Scrap the Girls blog by September 30th to have a chance of winning a prize from our very generous sponsor D-lish Scraps!

Thanks for visiting and taking a look at my layout! Thank you to those who leave a lovely comment as well!

Mandy

Sunday, 28 August 2016

Happy | Off the Rails Tutorial

Hi everyone!

Today I'm sharing my design team layout that I created for this month's mood board over at Off the Rails Scrapbooking, and I have some tips and techniques for getting the most out of your patterned papers!

Now I have a confession to make... I was planning on sharing a step-by-step tutorial for creating this layout, however the photos that I had taken of my procedure were on my phone which I unfortunately dropped in water last week and was unable to retrieve anything off it. I lost a few months worth of photos since I last backed them up :( The moral of the story is to back up your photos regularly!!! (I'm now using iCloud so that my photos are backed up automatically).

Here's my layout that I created for our gorgeous 'black and anything goes' mood board this month...


I must admit that I struggled a bit with this because I don't usually use black as the dominant colour on a layout, but I loved the challenge and I'm happy with the end result! The photo that I scrapped is of my eldest daughter taken when we went strawberry picking while we were on holidays last year! She was wearing a black hat and a dark floral dress, so I thought this would be perfect for this mood board!

So today I want to share some tips and techniques that I use to get the most out of my patterned papers! I used the Maggie Holmes Bloom collection for this layout. When I purchased this collection, the chipboard and ephemera were not available, so I was limited to the patterned papers and the puffy stickers, but I didn't mind, because it just meant that I had to get a bit more creative with using the patterned papers! So here are my tips...

1) Don't throw away the branding strip on your patterned papers!
I always try to think of ways that I can incorporate the branding strips onto my layouts, and on this page, I added it as a strip between the dark patterned paper and the white cardstock. I like the extra detail that this adds, and it looks like I've included more patterned paper onto my layout than I actually have!

2) Fussy Cut!
Look for elements in your patterned papers that you can fussy cut! The teacup on the bottom right hand corner of my layout was fussy cut from one of the patterned papers, as was the word 'beautiful'. I often like to use those busy floral patterned papers to fussy cut the flowers to use as embellishments for my pages.

3) Cut up your patterned papers!
I love to use my Silhouette Cameo to cut out shapes and words from my patterned papers. If you don't have a die-cutting machine, trace shapes and cut them out by hand. I didn't use my Cameo for this layout, but I did cut a little banner out of patterned paper to include on my page.

4) Don't waste!
If there are any parts of your patterned papers that are hidden, cut them off to use on a future project! For instance, on this layout I have backed my photo with patterned paper, but only a thin border is actually seen. So I cut away the middle section behind the photo, which is hidden, and I kept it to use for layering on another layout.

There are lots of ways that you can get the most out of your patterned papers! When we have to scrap on a budget this can be particularly important. I'd love to hear your tips if you have some!

Here are a few closeups of my layout so that you can see all the details...


And here's a reminder of this month's mood board...


I hope that you get a chance to play along with our mood board challenge this month! There's only 2 more days left to get your projects linked up!

Thanks so much for joining me today, and for any lovely comments that you leave!

Mandy

Saturday, 27 August 2016

Nature's the Place that I love Best | The Cut Shoppe Design Team Layout

Hi everyone!

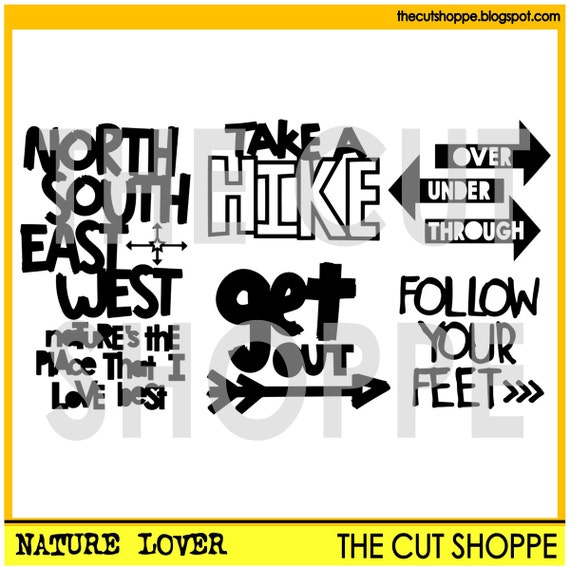
Today I'm sharing a fun layout for The Cut Shoppe using the Nature Lover cut file set!


I love this photo of my eldest daughter when we were camping a few years ago! She had created herself a bed of leaves to relax on and she had dirt on her face... I think this photo just sums up the fun that we have when we go camping!

I used one of the phrases from the Nature Lover cut file set for my title...

The Nature Lover cut file includes 5 nature themed designs, that can be used on your scrapbooking and papercrafting projects.

I wanted the title to be the main feature of the page (along with the photo of course) so I enlarged it so that it took up the whole left hand side of my layout. Once I had traced the phrase in my Silhouette software, I released the compound path so that I could play around with the words a bit. I resized some of the words so that some were bigger than others and moved them around till I was happy with their position, taking into account where I wanted to place my photo. I then cut the title out of a piece of white cardstock and backed each word with different patterned papers from the Pink Paislee Atlas collection.


I love large titles on layouts! I think they make a real impact and they take the hard work out of the design process! To embellish the page, I added a couple of felt clouds, some wood veneer pieces, and a flair button.


I added my journalling underneath the photo, and then I finished the layout off with some enamel dots and little word stickers.

Thanks for joining me today! Be sure to pop by The Cut Shoppe store to check out the new cut files that were released this week!

Mandy


Tuesday, 23 August 2016

Hello Sunshine | D-lish Scraps Design Team Layout

Hi friends!

I'm back with my final share for D-lish Scraps for the month, and this one is a bright and happy page featuring a photo of my youngest daughter enjoying playing on her slide...


I love the look of joy on Eleanor's face in this photo! She had just learnt how to go down her slide all on her own and she was so proud of herself!

I used some gorgeous colourful patterned paper from the Paige Evans Fancy Free collection for this layout.

Here are some closeups...


I used a wood veneer phrase from a previous Just Add Paper kit for my title. When I purchased the kit, I loved this wood veneer piece so much that I purchased an extra one, and I'm so glad that I did becuase it was perfect for this layout! Underneath the title I added two phrases, one from the orange minifetti sheet, and one from the 'Sweet Sentiments' Cardfetti sheet. These are still one of my favourite things to include on my layouts to add a little sentiment and a pop of colour to the page!


I created a flower cluster on the bottom left hand corner of my photo using an aqua Magnolia, a red Gardenia, and a yellow Hydrangea petal. I love all of the gorgeous paper flowers that are available from the D-lish Scraps store!!


Underneath the right hand side of my photo I tucked a pretty 4" lace doily, and then I created a little cluster that includes a flair button (from the Polaroid Picture set), a white cherry blossom, and a gorgeous yellow tassel.

I finished my layout off by tucking an arrow paperclip onto the top edge of the patterned paper, and scattering some D-lish enamel dots and wood veneer stars.

Thanks so much for visiting my blog, and for any lovely comments that you may leave!

Mandy

Monday, 22 August 2016

The Best Day | D-lish Scraps Design Team Layout

Hey everyone!

I'm back with another D-lish Scraps layout to share with you today, and this one features a photo of my hubby and I on our wedding day. We are celebrating our 14th wedding anniversary on Wednesday, so I thought that it was a good time to scrap one of our wedding photos! Here's my layout...


I chose some beautiful patterned papers from the Cocoa Vanilla Studio 'Love Always' collection for this layout, and I used a lovely cut file designed by Felicity Jane Studio for my title. (This cut file can be purchased from the Silhouette Design store). It was the perfect title for a layout about our wedding day!

Once I had my title in place, I then adhered a thin strip of patterned paper down the right hand side of my layout, as well as a strip of washi tape. Then I was ready to add my photo and embellishments!

Here are a few closeups...


I framed my photo with a Felicity Jane Studio frame that was created using the print and cut feature on my Cameo. Behind my photo I added a super pretty 4" lace doily! I'm loving this smaller size doily! You may have noticed that the wood veneer words are a favourite of mine, and even though I already had a large title on my layout, I couldn't help but sneak this cute wood veneer word onto my page!


I created a little flower cluster using a white azalea and a pink Kaisercraft bloom. I love how soft and pretty these two flowers look together!


I can't go past tassels at the moment! They are definitely one of my fave embellishments, and these pretty pastel ones are just gorgeous! I attached the tassel to a paperclip using some cotton twine. I also added a phrase from the 'Sweet Sentiments' Cardfetti sheet along with another word sticker from my stash.

I finished my layout off with a few black D-lish enamel dots and a couple of wooden flower buttons.

Thank you so much for popping in today to take a look at my layout! I'll be back tomorrow with my final share for D-lish Scraps for the month!

Mandy

Sunday, 21 August 2016

#epic | D-lish Scraps Design Team Layout

Hello friends!

I'll be sharing my August D-lish Scraps layouts with you over the next three days. Today I'm kicking off my project shares with my take on the current Inspiration Board challenge! Here's my layout...


And here's a reminder of the August Inspiration Board, 'Geometric Crush'...


I absolutely love this colour palette, it's such a great one for scrapping the boys in our lives! Other than the colours, I was also inspired by the triangles on the inspiration board, and I used the sketch as the basis for my design (although I used one horizontal photo in place of the three vertical ones).

The photo that I scrapped is a recent one that I took when we visited the Reptile Park during the school holidays. In the entrance is this replica of a crocodile and Isaac thought that it would be fun to stick his arm in its mouth as if it was eating him! Of course I had to snap a photo to document it!

I used mostly the August Just Add Paper kit to embellish my layout. Once again Amanda has put together a spectacular kit, that just made this layout come together so easily! And as always, I have embellishments left over that I can use on future layouts! Such amazing value for $10 a kit!

To start my layout off, I trimmed my cardstock down a little and framed it with some patterned paper. I then used a piece of star punchinella as a stencil, and added some inking around the edges of the layout. If you're wanting to get your hands on some punchinella, then head on over to the store, because it has just been restocked! But be quick, because it never lasts long!

Next, I arranged the wood veneer triangles from the kit on my page in a similar design to the sketch. I backed three of them with different patterned papers for added interest. I popped my photo on top of the triangles and then I was ready to embellish!

Here are some closeups of my layout...


How awesome are the layered die cuts that Amanda created for the kit?! It's like all the hard work is done for you! I added one of them on the top right hand corner of my photo. I also added one of the flair buttons here to create a little cluster, and I wrapped some twine from the kit around the flair.


I can't tell you how much I love the wood veneer words that come in the kits! They just make the perfect titles, and they look great either left raw or jazzed up with some ink! This one is still available here until sold out, and you can find more wood veneer words in the store here. I wanted to messy mine up a bit so I simply rubbed some grey distress ink around the edges with an ink blending tool. You can also see here that I used the yellow star pick from the kit, but I took it off the pick so that I could just use it as a die-cut. I added some foam tape underneath to give it extra dimension.


Lastly, I created a little cluster down in the bottom left hand corner of the layout. This wasn't on the sketch, but I often like to do this to balance out my layouts. I used a journal spot from kit to add some basic journalling to the layout, and then I added another flair button wrapped in twine, and a die-cut arrow from my stash.

I finished my layout off with some wood veneer stars (which I am loving at the moment!) and a few Kaisercraft epoxy dots.

I hope that I've inspired you to play along with our Inspiration Board challenge this month! Link up your layout in the sidebar over on the D-lish Scraps blog by the end of the month to be in the running to win a prize!

I'll be back tomorrow with another D-lish Scraps layout to share with you! See you then!

Mandy